I-Author Guide
You need the following software for this guide:
I-Author - Unfortunately the manufacturer no longer offers a free demo. Furthermore this software is only being distributed in China from this point on.
Easy CD Creator
I-Author is quite a powerful program if it comes to SVCD creation. It allows you not only to multiplex video and audio files but to create your own professional SVCD menus and stuff. So let's get right at it:
First of all let's multiplex our audio and video that we just created. Usually these files are named video.m2v and audio.mp2 whereas I-Author only like files called .mpv and .mpa so let's rename the video to video.mpv and the audio to audio.mpa. The fire up the multiplexer:
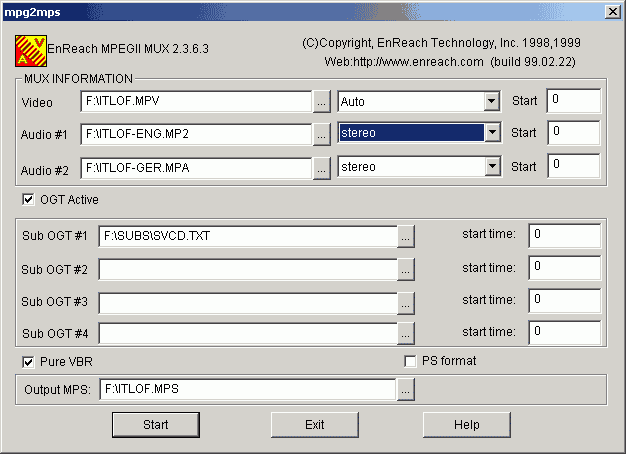 Note: This is the same screenshot as used in the multiple audio and subtitle guide.. ignore that there's a second audio track and there's OGT Active... you won't need it.
Load your audio and video file and start multiplexing. This usually goes without errors.. Check wheter the movie is synch, if not use the Start field for Video and or Audio to offset the two against each other till you have proper synch.
The fire up I-Author
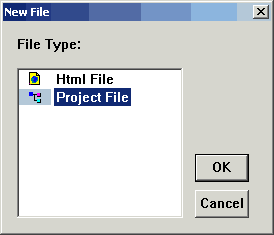 Create a new Project by pressing File - New
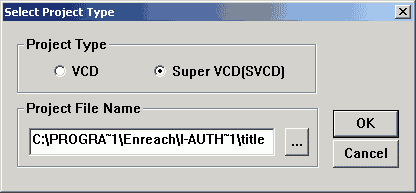 Obviously we're going to create an SVCD so select the right Project Type.
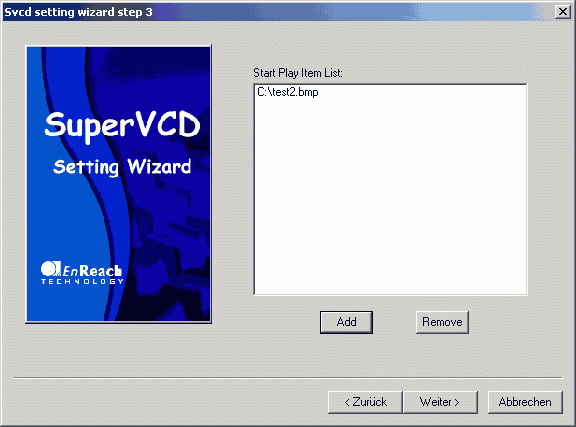 We're going to set up what will first be displayed when the player accesses our SVCD. Create a black bmp image at the size if your video file. By pressing Add the file selection dialog will pop up, change file type to bmp and select the black image. Then click next.. or whatever that button will be called in your native language.
Note: Should you not want a menu then you just select your movie file here and press Next until the wizard is done.
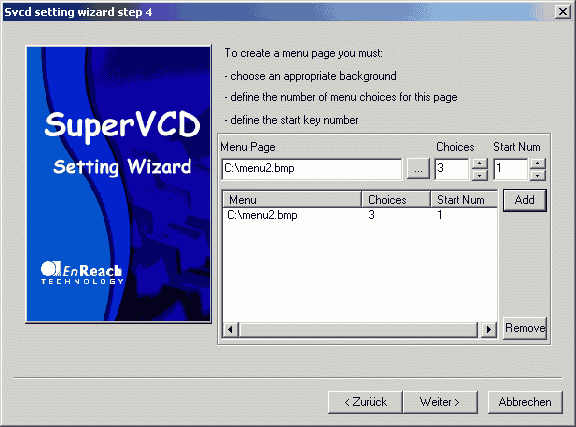 The next step involves setting up our main menu and access to our different movies. Menu2.bmp is a little graphical menu that allows you to access to two different movie files and another option to start one movie at 1:30 instead of 0:00. That makes 3 choices.. If you want to have more choices in your man menu just increase the number of Choices. You can also create more menu pages and set choices for them but at the moment one menu page is enough..
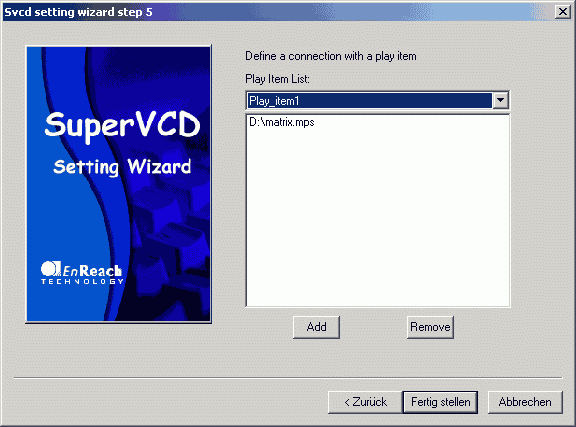 Now we're going to associate each Choice we defined above with a certain action. Remember we have two movie files that we want to launch and an option to launch one movie a minute after the beginning. Play_item1 corresponds to our first movie, so select Play_item1 in the drop-down list and press the Add button to select the appropriate movie file, repeat the step for Play_item2 and for Play_item3 Add the same movie file as you chose for Play_item1. The Press Finish..
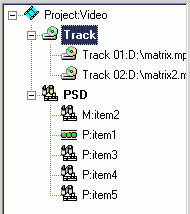 Now we're in the authoring stage. We're now going to define how each play_item should behave. Let's recall: P:item1 represents menu3.bmp and is the dummy file we use to make our menu work (thanks to Robshot for mentioning the dummy.bmp trick in his excellent SVCD guide... otherwise I'd still be wondering why the heck my menu wouldn't play..). M:item2 is our main menu, P:item3/4 are our two movie clips and P:item5 plays the movie clip from the starting position 1:00. First of all double click on P:item1.
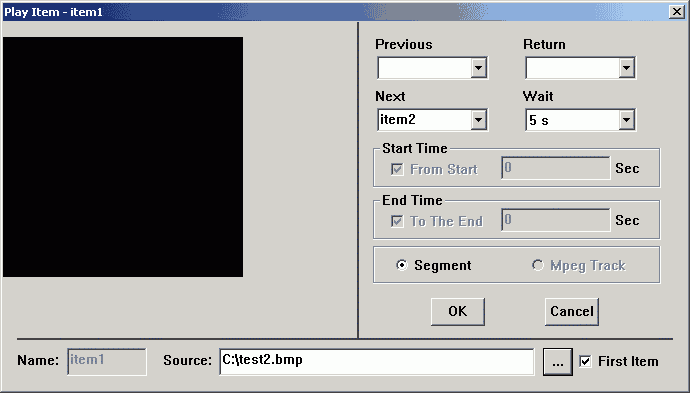
As this is the first thing the player is going to load it will have nothing previous to it and you can't return to anywhere. You can see that I set Next to item2. This means that the next thing the player does it to load M:item2, our main menu. It'll also do so immediately since we set Wait to No Wait. Press OK and double clock on M:item2..
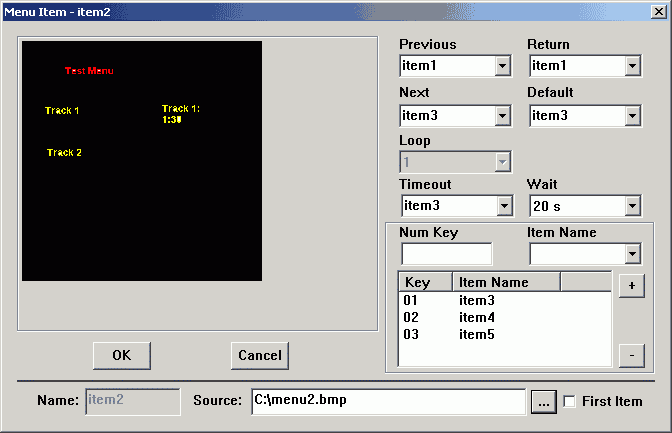
So here we set the behavior of our main menu. Set Previous and Return to item1. If you press the Previous or Return button on your player this will result in the menu being loaded immediately again since we set item1 to immediately jump to item2. Next and Default is item3, our first movie file. You can also see that the items have been associated with a key on your remote by default. Pressing the "1" key will results in immediate playback of the first video file, etc. Press OK if you're done. The double clock on P:item3
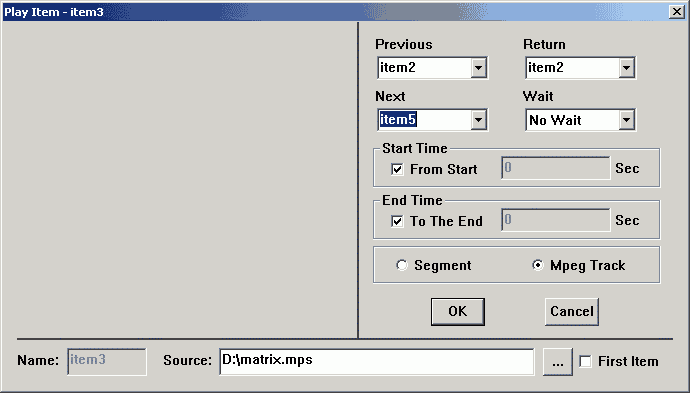
Once again pressing Previous or Return will bring up the main menu again , pressing Next will jump to the 5th item.. which we're going to set up to play the same file but starting at 1:00. Set Wait to No Wait to start playback immediately. You can set up item4 the same way and then it's time to set up item6:
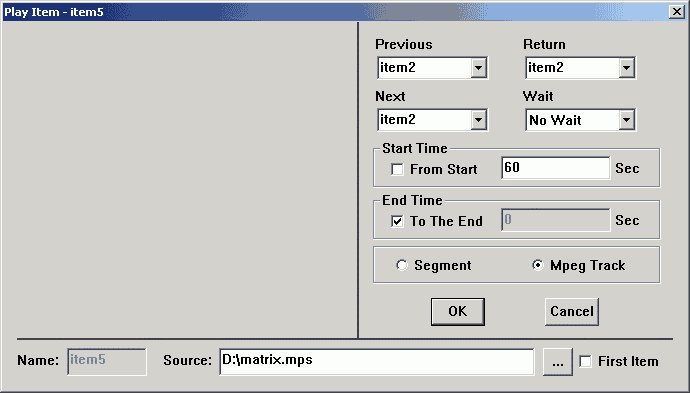
Different to what we did above we actually set a Start Time. As we want this item to play from position 1:00 we set Start Time to 60 seconds. If we wanted we could associate the Previous Button with item3 to jump to the beginning of the video file..
If you're happy with the Play Item setup then it's time for a little fun.

Pressing the button that has a CD and a question mark on it will open the following dialog:
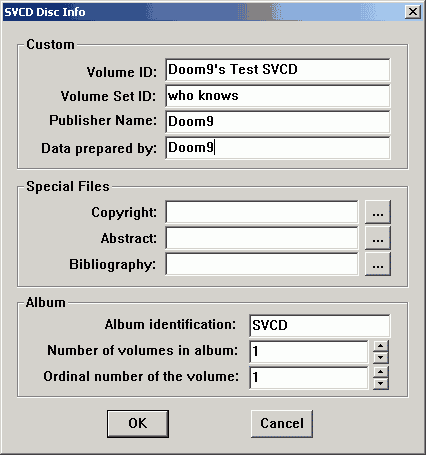 Set whatever you like here... Volume ID is the name that will be displayed in Explorer on your pc if you put the CD into a drive..
The last step is creating a disk image. Press the big violet circle button right besides the button to show the Disc Info. After a while the status window should show something like:

Step 2: Burning the SVCD
So far Adaptec Easy Creator is the only program that can burn the cif image I-Author has created. Let's hope that in the future Enreach will support other programs.
Start Easy CD Creator, then File - Create CD from Image

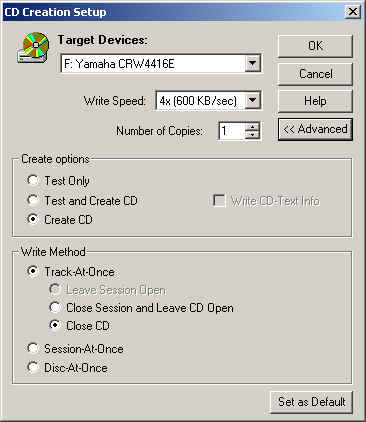 It's important that you select Track-At-Once but that's selected by default. Burn baby Burn...
And congratulations... if you got to this point and your SVCD works fine you can consider yourself an advanced ripper... mastering SVCD is a considerable achievement.