I am going to describe the 2-pass method here, since it gives you the best quality and in addition filesize predictability (e.g., 700 MB for one CD). Because I'm lazy I'm just going to do the audio with VirtualDub to create my cbr mp3 (constant bitrate mp3). If higher quality is important to you, you can of course use Besweet for the task.
You can look here for creating High Quality Sound (vbr mp3/ogg).
If you processed your video with VirtualDub, and you have chosen another format than DivX/XviD (thus DVD, SVCD, VCD, etc.) you can skip the following steps and go directly to the VirtualDub frameserving section.
A short guide of encoding to DivX5 is given below. If you want to encode to XviD, you can follow this guide (maintained by snowbeach).
I'm creating one CD encodes from almost all of my captures. To get the best picture quality possible, I cut the audio quality. Therefore I only create a 96 kbit mp3 file. If you are just encoding short video clips (e.g., music videos) and quality is important to you, you should choose "one pass quality based 100%" in the DivX dialog and also raise the audio bitrate. Also raise the audio bitrate if you are going for more than one CD. Then you can easily choose a bitrate of 128 kbit or higher. This also means that if you just want to send short clips over the net you can go below 96 kbit. Translator: bitrates below 56 kbit are not recommended though!. This again is your choice!
Calculation of the bitrate
theoretical aspect:
· audio first:
We choose audio with 12 KB/sec (mp3 @96) kbit/8 = KB/sec. This
has to be multiplied by the length of the movie (in seconds!). Then divide
the result by 1024 to get the audio size in megabytes. This value has to
be deducted from 700 (MB of a 80 minute CD-R) to get the amount of space
you'll be able to use for the video. (e.g., 90min. x 60 = 5400sec. x 12
= 64800 Kilobyte / 1024 = approx. 64 MB. Therefore for the film: 700 -
64 = 636 MB, it's always better to round down the value!)
· Calculate Output Video Bitstream:
Therefore take 636 MB x 1000 gives Kilobyte x 8 gives Kilobit. That
is the space available on your CD. (636 x 1000 x 8 = 5210112 Kilobit).
Now calculate kilobit per second (5210112 / 90min. / 60sec. = 964).
The result is a video bitrate of 964, please note it somewhere since we'll need it later!
The difference between 1000 <-> 1024 is because of the different calculation that is used as DivX calculates with 1000 Byte = 1 KB and the normal calculation as used in the mp3 codec is 1024 Byte = 1 KB.
For an easier way to do this use a bitrate calculator like the one included in GordianKnot (doom9 download section).
Setting up VirtualDub
For a better understanding I'll sum up the following steps:
First the 1st pass DivX is done. In this step only a small .avi
file and a .log file are created, where the codec just remembers the data
it needs for the second pass. You will not be able to play this .avi in
your video player since it does not contain all of the data.
Second you of course do the 2nd pass. At the same time the audio
(.wav file) is converted to an mp3.
To avoid having to wait in front of your PC until the first pass is
finished, I'm going to use the job list so the whole process is done without
human intervention.
1st-pass settings
Audio -> No Audio
Video -> Full Processing Mode
Video -> Compression -> DivX 5.02 Pro -> Configure
The window that pops up now has 4 tabs which we are going to go through now.
Of course these are the settings that work best for me, feel free to fiddle around with the settings to get the results that suit you best. Especially, the "Psychovisual Enhancements" and "Pre Processing Source" are parameters that should be adjusted appropriately for each film.
on the "DivX Codec" tab:
2-pass, first pass
Enter the encoding bitrate we have calculated above (e.g., 964)
check "Use GMC"
check "Use Bidirectional Encoding"
Logfile and MV-file should be saved directly in the root directory
(C:\) and not in the folder where your captured contents are placed.
Tab: "General Parameters":
Activate "Psychovisual Enhancements" and choose normal
Activate"Pre Processing Source"; if you have a good source,
choose Light, the worse your source is, the more you should move your source
to the right. This is going to remove noise from your movie, but also smooth
the picture the stronger your settings are. Therefore I usually choose
Light.
Keyframes: This is also a very vague setting: for fast searching
within your movie choose a smaller value (not below 100 though), if you
are short in bitrate, rather go up (shouldn't go over 300-400 though).
Enter your value into "Max Keyframe interval". "Scene change threshold"
defines how sensitively the codec reacts to scene changes and therefore
inserts a new keyframe. I usually leave it at the default of 50%.
Tab: "Advanced Parameters"
Quantizers define how strong the video is compressed. This is only important if you use one pass quality based, then the default is set to 2, increasing the value will give you a smaller filesize. Some veterans say you should leave it at 2. I choose "Maximum quantizer at 10 and "Minimum quantizer" at 2.
RC averaging period, frames should be set to half of the amount of frames, you are going to encode. Therefore, if your movie consists of 10280 frames, set the value to 10280/2 = 5140. This should get the codec to end up with the right bitrate / filesize. If this is not clear to you, check back here Doom9.org forum

"Manage Settings" is of no importance to you, just hit "OK" twice to get back to VirtualDub.
Options -> Display input Video (deactivate)
Options -> Display output Video (deactivate)
Options -> Sync to audio (activate)
Now we are going to save the first pass:
File -> Save as Avi
choose a filename, e.g., "first_pass.avi" and don't forget to check "Add operation to job list...". If you don't check this, the process will start immediately.
Settings for the 2nd- pass
Audio -> Avi Audio
Audio -> Full Processing Mode
Video -> Full Processing Mode
Video -> Compression -> DivX 5.02 Pro -> Configure
Leave everything as it is. Just change "2-pass, first pass" to "2-pass,
second pass", since we want to do second pass now.
Audio -> Compression -> MPEG Layer-3 -> 96kBit/s
Leave the rest as it is. Now do the same as in the first pass:
File -> Save as Avi
Choose the filename, e.g. "final.avi"and don't forget to check "Add operation to job list...". If you don't check this, the process will start immediately.
Start encoding
To start the encoding process, proceed as follows:
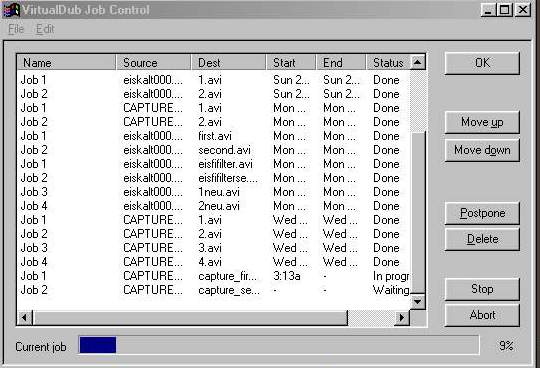
File -> Job Control (or F4)
The popup displays all jobs you've told it to do, including previous
jobs you have finished, but not yet deleted.
When you look at the "status" value, you should have two jobs on "waiting".
One click on 'Start' and VirtualDub will do the rest.
That's it. After several hours of encoding you should end up with a ready-to-burn .avi file.
(optional next step <Improving playback quality> )
(optional next step <Audio problems> )
(optional alternate step: <High quality Sound (vbr mp3/ogg)>)
Next step: Appendix: <NEXT>
Back to the Index: <HOME>
Last edited on: 09/16/2003 | First release: n/a | Author: BaronVlad | Translator: SteVe (killingspree) | Content by Doom9.org